

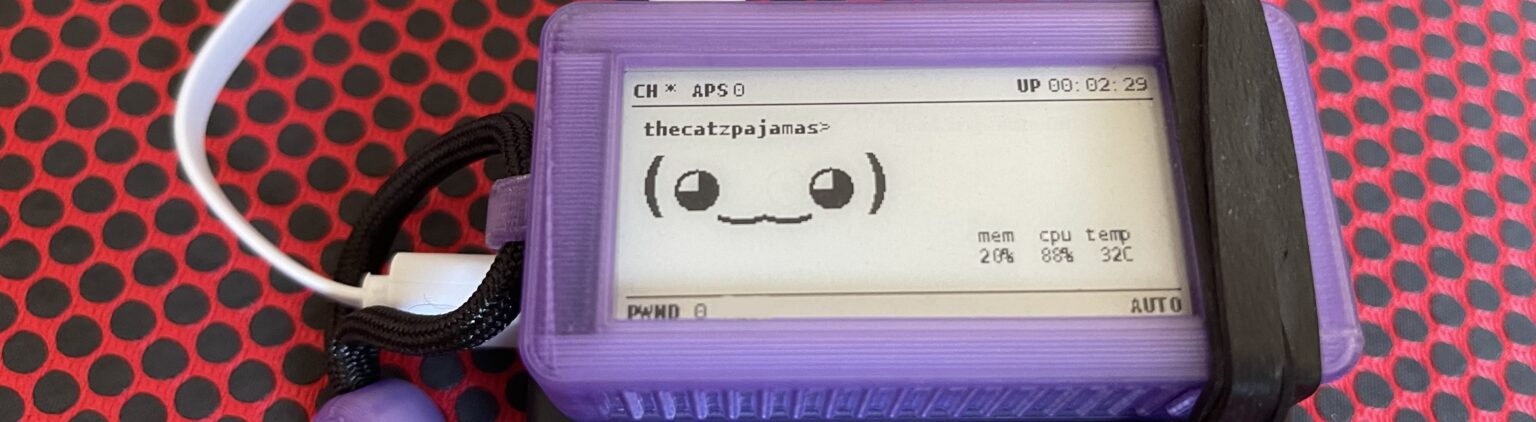
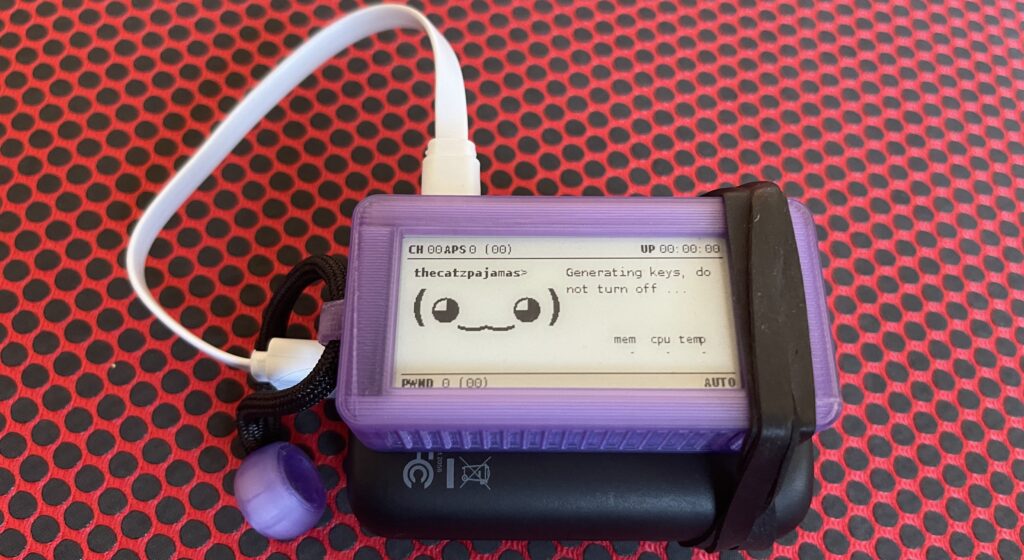
For my first post, I wanted to show off the pwnagotchi. This little device, that takes inspiration from the classic tomagotchi, lives to eat wifi packets. It listens for any communications between a client and AP then tries to extract crack-able information that we can then attack with tools like hashcat.
It also has an AI function that is supposed to learn over time how to better collect packets that are likely to result in loot. I just bought mine from the PhreakBoutique team over at pwnagotchi.com about a week ago. Their product works on arrival but I wanted to learn about it so I reflashed it. While there are plenty of articles talking about building or setting up a pwnagotchi, I felt like I still bounced around sites trying to get all the information I needed. I wanted to record my setup process, struggles, and example of use for my future self or anyone trying to set up their new friend. I have edited some info out of my photos in this post, so they will look slightly different than yours.
Let’s start with how the attacks work. There are a few methods that get employed by the pwnagotchi; deauthentication attacks, PMKID attacks, and passive collection.
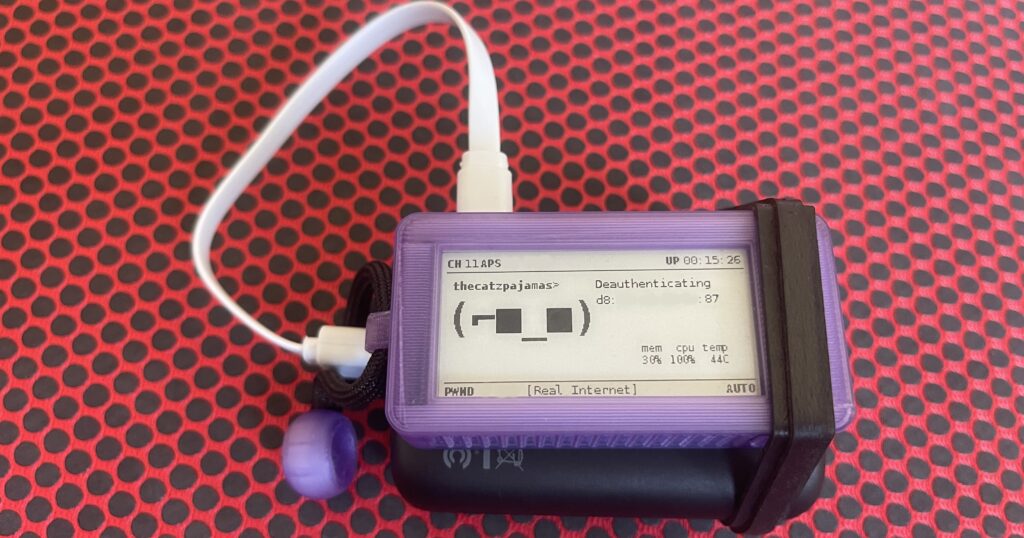
The deauthentication attack works by sending deauth frames to either the client or access point. Normally deauth frames are sent to signal that a device wants to drop the connection, but since we are snooping on traffic we can see the MAC address of both devices and “send them on their behalf”. This results in denial of service as the wifi connection is repeatedly dropped. But in the pwnagotchi’s case, we are deauthenticating a client so we can then observe the four-way-handshake that occurs while it automatically attempts to reconnect.
Capturing the packets while it reconnects hopefully provides us with enough data to try to crack the wifi password.
PMKID attacks are an improvement over this last method as it doesn’t require you to deauthenticate a device and successfully intercept the re-auth attempt. PMK (Pairwise Master Key) is essentially a PSK (Preshared Key). A PMKID (Pairwise Master Key Identifier) is used to help facilitate roaming of devices between multiple AP’s.
Instead of having your device repeat the four-way-handshake every time you go in and out of range of an access point (which can create overhead on the network at enterprise levels), the AP and client create a PMKSA (PMK Secure Association) and a PMKID to represent that association. The access point does need to have roaming features enabled to use this attack, but it is very common.
In the PMKID attack, the pwnagotchi initiates an association with the AP and tries to elicit a PMKID in response. Since this PMKID has a hash of the PMK in it, we have everything we need to start cracking.
The last method the pwnagotchi uses is passive gathering. Essentially it just listens for handshakes that are happening around it without instigating the interaction itself. Some good sources for more information these processes are the announcement of the PMKID attack from the HashCat team as well as this article from hackingarticles.in.

I purchased my unit from pwnagotchi.com but I would like to build one myself in a future project when I have the proper tools and know-how. In addition to the pwnagotchi, I got an external power brick. Their pwnagotchi’s don’t have a battery so you will need something to power it from.
I hadn’t done a ton of research into this before purchasing my unit. I just built this site so I figured I would dive in and make a post to go with it. I learned that the original pwnagotchi build stopped getting updates back in April of 2021 but there are a couple other mainstream forks of it that people use today, jayofelony’s and aluminum-ice’s. I used jayofelony’s image since aluminum-ice’s isn’t supported on my hardware. The AI has been disabled in their version of the firmware though with the message:
“The “old” Pwnagotchi used to have AI to help it learn from its environment, but since then AI seemed to destabilize the Wi-Fi firmware. So I have chosen to remove the AI completely to give the Pwnagotchi more up-time and longer battery life when taking it on a walk.”
This was a slight bummer for me, in part because I had already spent time trying to troubleshoot why the AI wasn’t working. Jayofelony seems to update their image regularly though which is great. Without AI, the pwnagotchi will run in either MANU (manual) or AUTO (automatic) mode as indicated in the bottom right of its display. AUTO is the normal mode it will run in while MANU is what you will set it to when you want to use the bettercap webUI.
My pwnagotchi is running on a Raspberry Pi Zero W (32bit) and a WaveShare V3 e-ink display, so if you are using different hardware you will have to compensate for that in the following steps. We can start by getting our fresh MicroSD card connected to our pc, downloading BelinaEtcher (or Rufus), and the latest pwnagotchi image from jayofelony.
Use BelinaEtcher to flash the .img file from jayofelony onto the MicroSD card. You may get errors about formatting while it runs, just close the popups and wait for BelinaEtcher to finish. Once it’s done we will have a new drive named bootfs.
The pwnagotchi has the ability to upload captured hashes to online cracking sites given you have an account and an internet connection. Before we start setting our config.toml file, you will want to have your API keys for these sites handy: WPA-Sec, Wigle, and OnlineHashCrack. If you don’t have an account, they are all free and easy to set up.
Now you will need to get the SSID and BSSID of your home wifi for use in whitelisting. You will also need to check your pwnagotchi’s display’s value in this page. Starting on line 240 we see various display types listed and their respective values.
Make sure to note the right one for your setup. I have the WaveShare v3, so my value is set to “waveshare_3” according to that page.
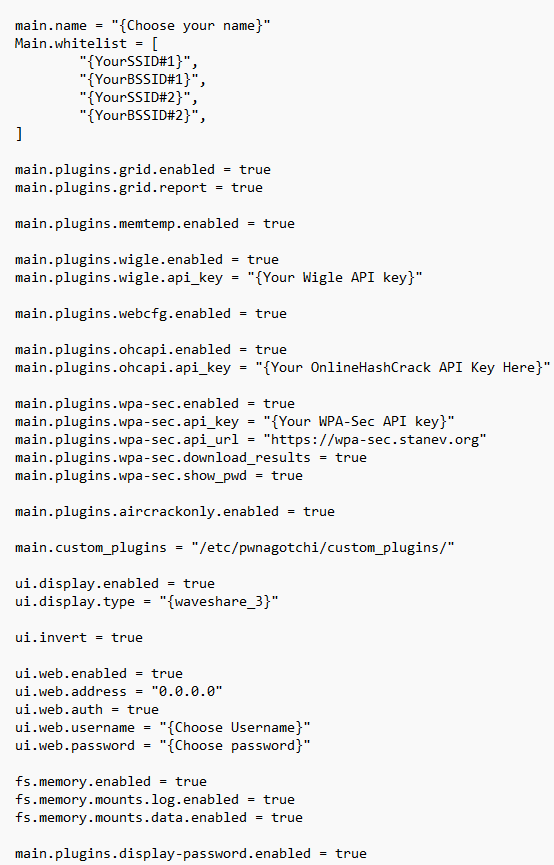
We now need to grab a copy of default.toml which will be used to configure our new friend. Copy default.toml to the root of your bootfs drive and rename it to config.toml. Open config.toml and set the following parameters. Omit the { } when you fill yours out. All of these parameters besides the AirCrackOnly one should already exist. Only values that need changing are listed.
Save your changes to config.toml. In my first build I was having an issue where my unit would only run for 15-30 before freezing and in my search to resolve this I came across this fix that helped some. In the bootfs drive there is a config.txt file for the Raspberry Pi that powers the pwnagotchi. The solution is to modify this file to slightly overclock the Pi by appending the following to config.txt:
#Freeze fix
arm_freq=950
force_turbo=1
over_voltage=4
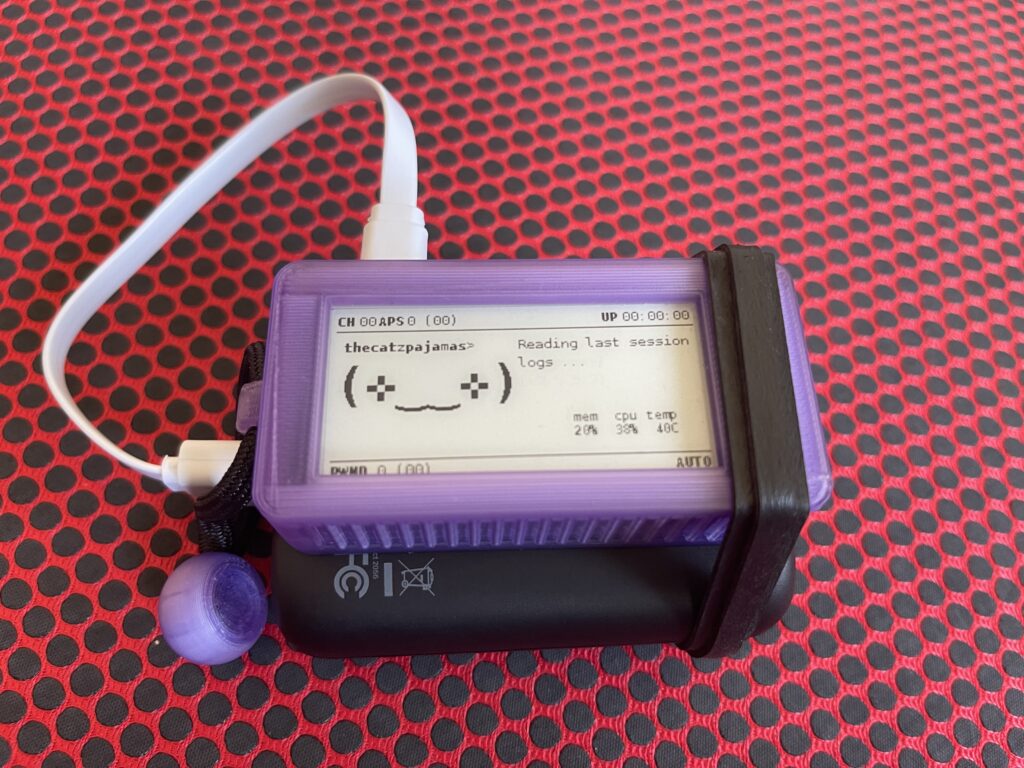
We can now eject the MicroSD card and insert it into the pwnagotchi. We should let the pwnagotchi fully boot one time before proceeding further. During the first boot your pwnagotchi has configuration steps that make it take longer to load. You DO NOT want to interrupt the first boot, just let it take its time (10-20+ minutes).
Before we connect it to our computer, assuming you are on Windows, we will want to install the drivers so our PC can connect. Download the driver named “Acer Incorporated. – Other hardware – USB Ethernet/RNDIS Gadget” from this Microsoft Page.
The pwnagotchi has two micro-USB ports, one that does data/power and the other is just power. We can now plug the pwnagotchi into our computer using its data/power port (the one closest to the MicroSD card). Open Device Manager in Windows and look for the new USB Serial COM device that appears under “Ports (COM & LPT)”.
We need to right-click and update drivers then select browse. Select the driver we downloaded earlier and let it update. After it is done, we should see a new object in the Network Adapters tab called USB Ethernet/RNDIS Gadget.
In control panel we are going to navigate to ‘Network and Internet\Network Connections’ and look for the one that mentions RNDIS. We can rename this to pwnagotchi. What we are about to do is allow your computer to share the internet connection from one network adapter to your pwnagotchi’s network adapter, effectively giving it internet access.
Right-click on your network adapter with internet and select Properties then select the Sharing tab. Check the box to allow other network users to connect through this computers internet connection, then from the dropdown select the pwnagotchi (if you renamed it then you should see that, otherwise it will appear under the default name).
Apply your changes and now right-click > Properties on the pwnagotchi’s network adapter then select “Internet Protocol Version 4 (TCP/IPv4)”. We are going to select “Use the following IP address:” as well as “Use the follwing DNS server addresses:” and use the following settings:
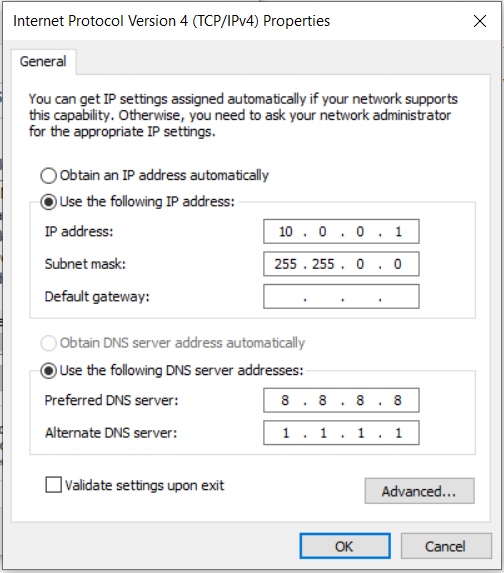
It’s important to share the internet connection before configuring the pwnagotchi’s adapter because when you share the connection it will overwrite some of the changes we just made.
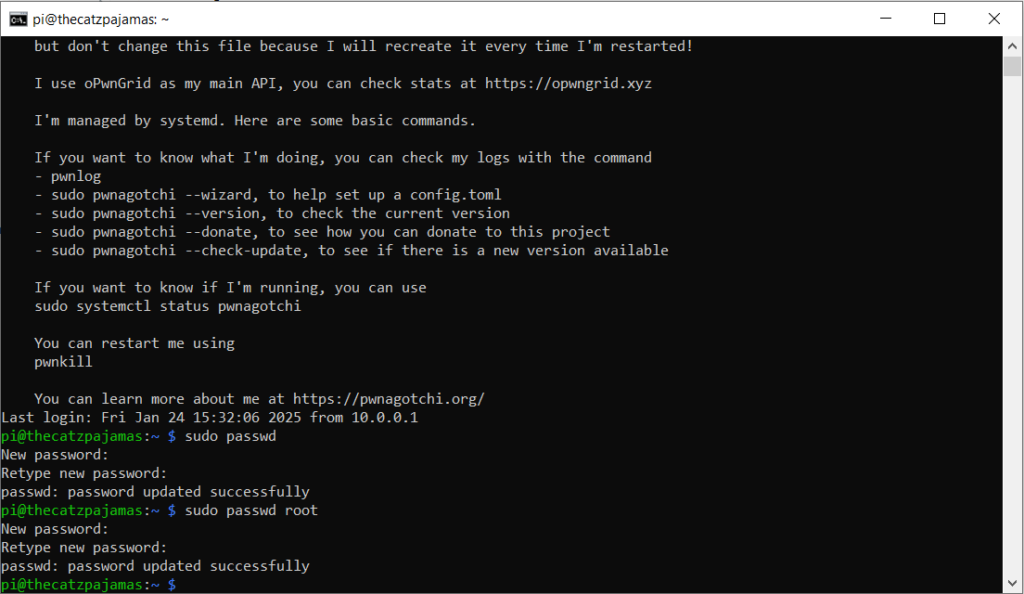
Now we are going to SSH into the device to configure it further. To do this, open command line and run “ssh pi@10.0.0.2”. Enter yes when prompted and then the default password is ‘raspberry’. Once logged in we will go ahead and change the default passwords for both the pi and root users using the commands below:
At this point you may be tempted to update/upgrade your device. I have seen conflicting statements about this online though. Many users in github forums mention that doing this has helped with their unit crashing, but then I also saw where people discussed that it relies on certain versions of packages and that upgrading could break a dependency the pwnagotchi relies on. I’m currently running mine with it upgraded though.
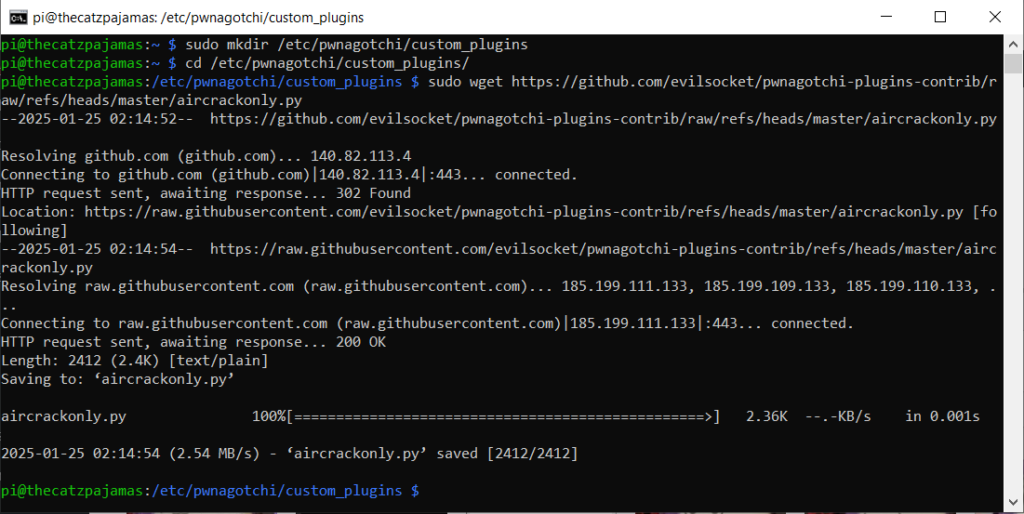
Navigate to /etc/pwnagotchi and create a folder named “custom_plugins”. There are numerous custom plugins out there that add different functionality to your pwnagotchi. In testing with my equipment though, most of these caused the unit to become too unstable to run for more than ~15 minutes.
I am going to walk through the settings and install for ones I used on my current mostly-stable build. If you want to use other plugins I would recommend only turning on one new one at a time and testing after to ensure your unit is still stable after. Use wget to download plugins into the new folder.
For now we will just grab AirCrackOnly. This plugin ensures that the captured packets have crackable data in them, and if not it discards it. If you are unable to get it to download then you will need to go back and make sure the network sharing settings are configured correctly.
You may notice when using your pwnagotchi that it captures data from your home network despite being whitelisted, this is because the unit will still passively collect data. It won’t attempt to associate with or deauth any devices for them though.
You can now reboot your pwnagotchi from the ssh shell and let it do its thing! You can also reboot your pwnagotchi by navigating to http://10.0.0.2:8080 on the computer it is connected to or if you are in a pinch you can just unplug it when you see the green activity light stop blinking.
The webUI also mirrors the pwnagotchi’s screen, allows you to access their mail system, and manage extensions somewhat. Alternatively, you can boot your pwnagotchi into MANU mode and then access the bettercap webUI via http://pwnagotchi.local (where “pwnagotchi” is whatever you named yours).
With your friend beginning to interact with the world around it, I recommend you learn about the faces here.
Upon connecting to your computer, the pwnagotchi will automatically upload crackable content to WPA-Sec, Wigle, and OnlineHashCrack as long as you shared your internet connection correctly. You can also set your pwnagotchi up to bluetooth tether with your phone. It has the benefit of sharing your phone’s wifi and being able to access the webUI on the go. I found that having bluetooth tethering enabled was actually too much of a drain for my device. Turning it off made it so my CPU usage finally dropped below 100% all the time and my unit went from crashing every 30-45 minutes to lasting 3-5 hours. I think there is a ton of utility in having the bluetooth tether enabled but I will need to build a beefier pwnagotchi for that.
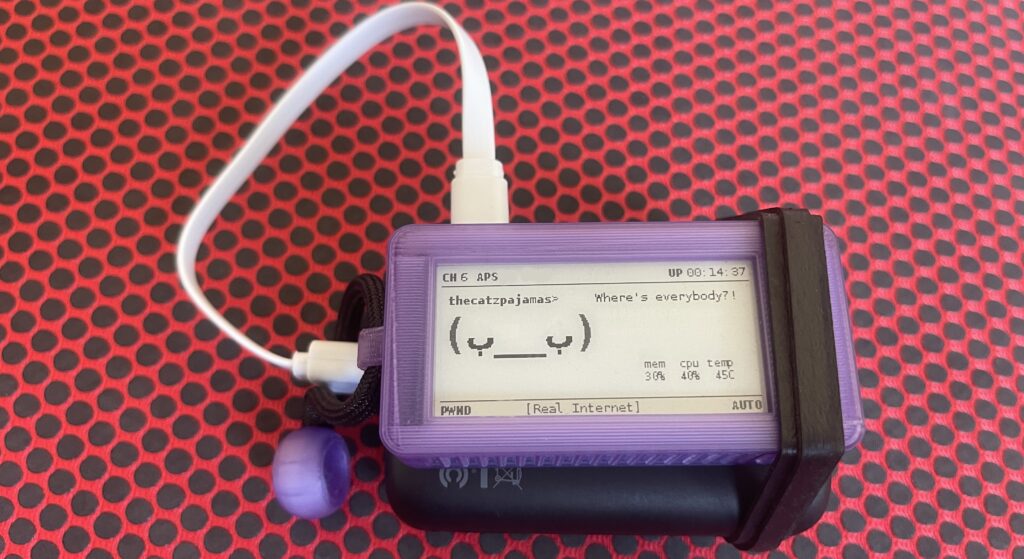
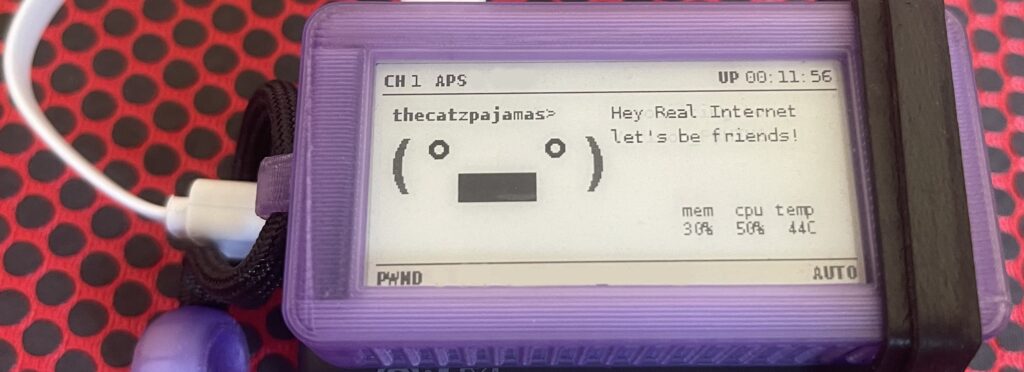
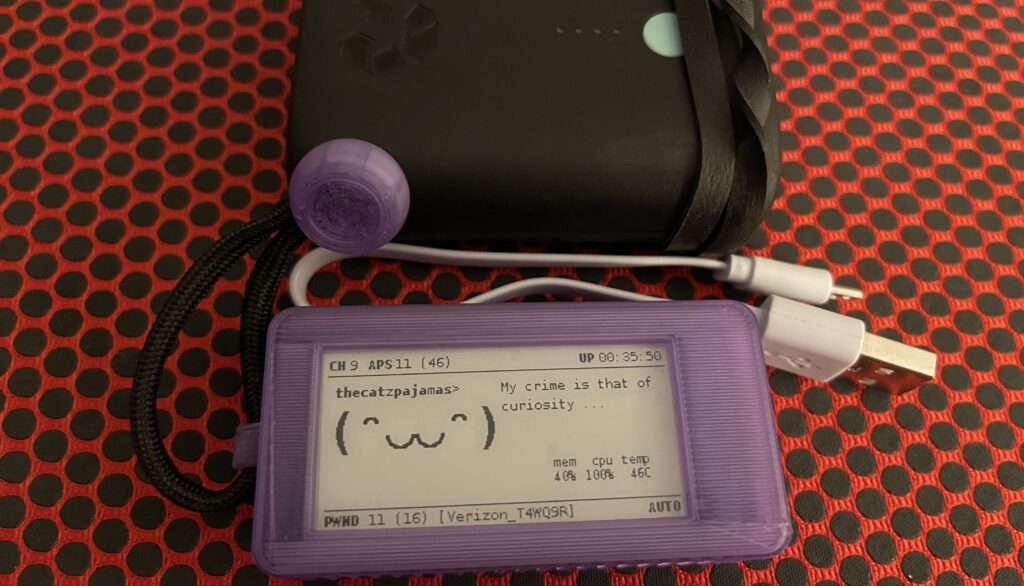
Now that our new friend is set up we can walk through a scenario of how to use it. At this point I have my pwnagotchi rubber-banded to the power bank with a short cable connecting them (as you have seen by now). I set up a network named “Real Internet” and we are going to use the pwnagotchi to capture the handshake or PMKID before cracking it with hashcat. I connected a few devices in my home to Real Internet and had them generate some traffic for the pwnagotchi to interact with. After a short while I was able to capture a handshake with my network.


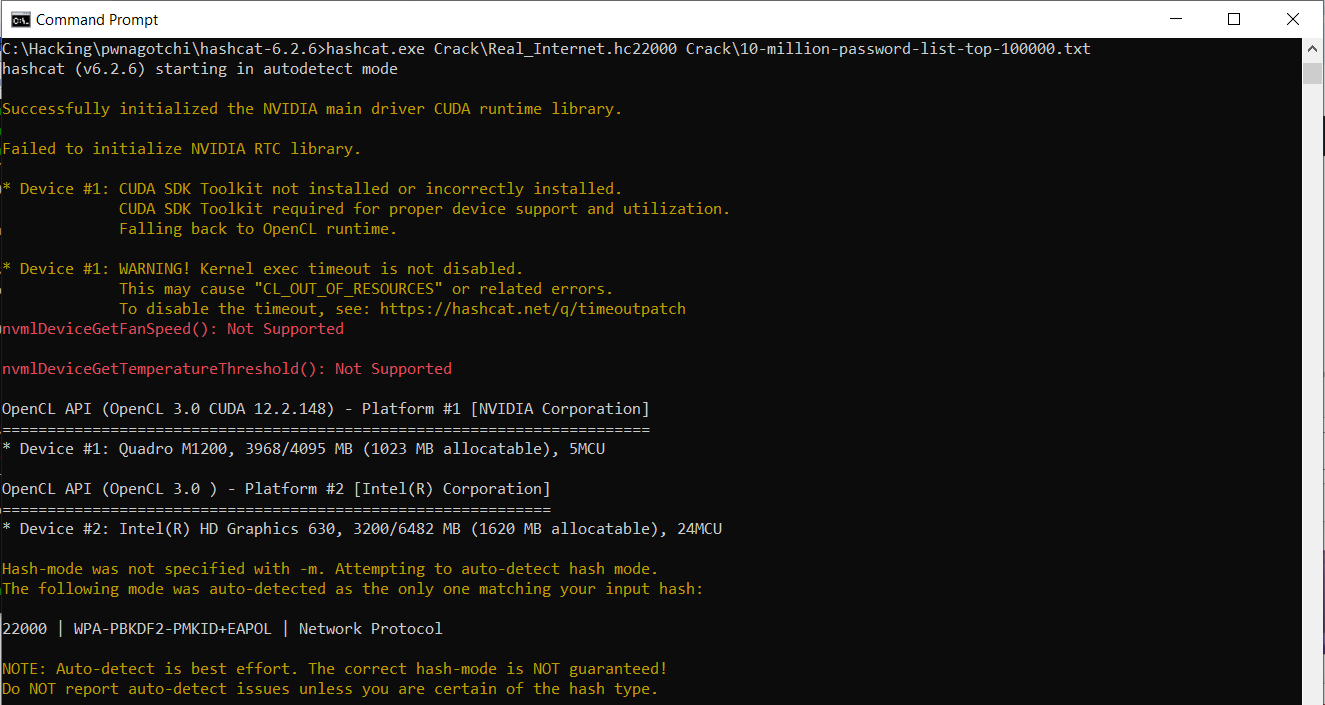
That’s all I need so I cut the power and connected it to my computer again. As it boots up from your computer you will see it uploading your data to the various sites we configured. None of them were able to crack my password, so we are going to move on to cracking it ourselves. I’m running Windows at the moment, so I will be using hashcat for windows in this example.
Unzip the package and create a folder in there named something like ‘Crack’. Lets also download a wordlist to Crack. To get our pcap’s off the pwnagotchi we will use WinSCP. Connect to your device using WinSCP and your SSH credentials. Once in, navigate to your /home/pi/handshakes folder and copy your pcap/PMKID files to your pc. For us to to crack our pcap file with hashcat we actually need to convert it first. You could use hcxtools for this, but for this example I am just using hashcat’s web conversion tool. Save the hc22000 file to the hashcat Captures folder and we can get crackin!

Success! We have managed to crack our own password. Now since this was a proof of concept, I actually put my password into the wordlist to guarantee a crack. This password is unlikely to be cracked off a dictionary attack or in any reasonable amount of time.
So that is what it looks like to setup and use your pwnagotchi. Again, everything done has been against my own equipment and you should only ever do so ethically/legally.
I would say I probably don’t recommend buying yours from pwnagotchi.com. The convenience of it being prebuilt doesn’t outweigh the cost and the fact that they use a Raspberry Pi Zero W (32 bit) instead of a Raspberry Pi Zero 2 W (64 bit), both of which are ~$15 retail. Also no battery is a bit of a bummer. But it was a good experience overall.
I plan to revisit this in a future post but I will build it from scratch. The plan is to make one with a bit more power so I can stably run things like Bluetooth tethering, backup syncing, GPS, SSH from mobile, and messing with the bettercap portal more. I strongly recommend exploring pwnagotchi.org and pwnagotchi.ai to learn more about the project.
The last and most important thing to mention is how to protect yourself from this type of attack. You can switch to WPA3 but the Dragonblood vulnerability caused by WPA2 backwards compatibility still leaves you potentially exposed. The best option is to use a strong passphrase. Something 20+ characters if you can stomach it, words that aren’t in the dictionary, mix of languages, symbols, and numbers are all good ways to decrease the chances of your password getting brute forced. Since attackers are cracking already captured data, they can spend as much time and resources as they want on it. Here is a great chart on the topic from the California Institute of Technology.
Thanks for reading!
[CATZ….HACKS]