025#: The WiFi Pineapple
Intro
Today’s article is one I have been looking forward to for a while now. I got my WiFi Pineapple in December of last year but got so busy with the website that I never got around to really playing with it. I began this site with a hardware post, so my 25th seems like a great time to revisit with the WiFi Pineapple.
Here, I will touch briefly on device setup before launching into a real world example of how you would conduct a security audit. This post will take us from identifying a target, performing a deauthentication attack, cracking a wifi password, performing an evil twin attack, and ending with a phishing attack that leverages DNS poisoning to draw the victim to a credential harvesting site.
I think the hardware articles are cool because they feel more tangible than a lot of these Hack the Box rooms. Ultimately, this is just one more tool in the toolset. But it does feel more like what I imagined a hacker would be doing, before I started trying to become one.
¡Disclaimer!
Everything done in this article was on my own equipment and networks. Auditing and attacking technology that you do not own or have expressed consent to do so may be considered illegal. Never attempt this on targets you do not have permission to test.
¡Disclaimer!
What is a Pineapple?
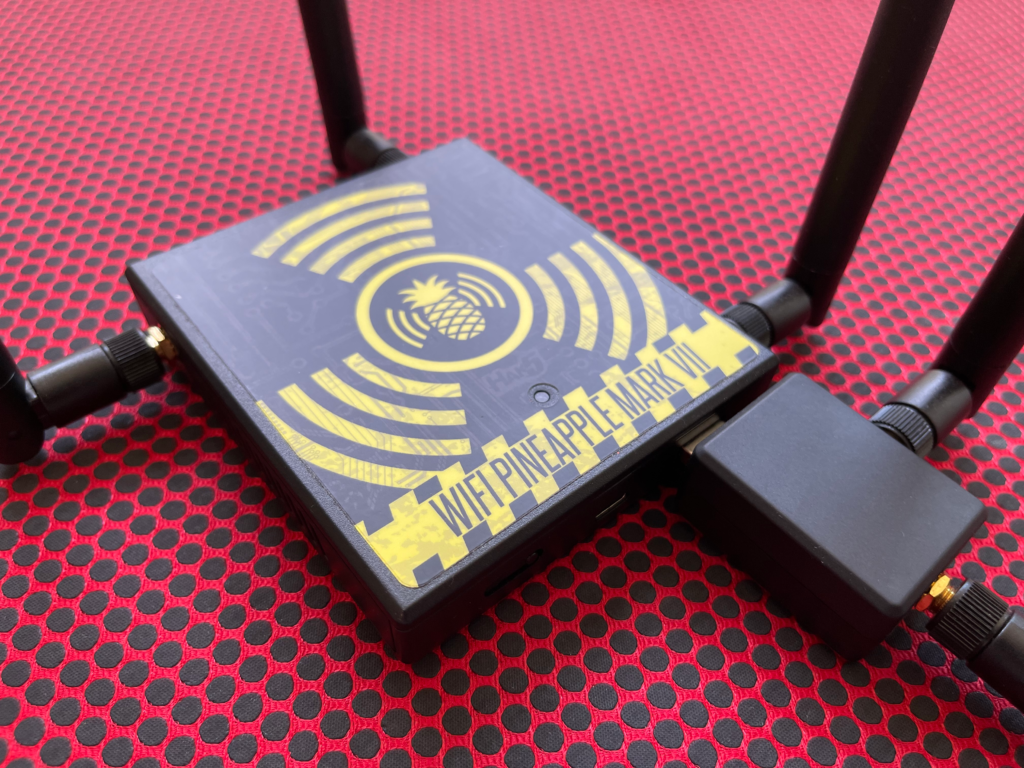
So what is a WiFi Pineapple? You may have seen this gadget from Hak5 used on shows like Silicon Valley (S4E9). I used the WiFi Pineapple MKVII with the MK7AC adapter for this article. With the adapter you can work with 5GHz networks, but for this demonstration we will just be utilizing 2.4GHz.
The Pineapple is one of the most advanced wifi auditing tools you can get your hands on. It has three wifi radios in it, giving us the ability to simultaneously do things like connecting the Pineapple as a client to a wifi network, acting as a rogue access point, and listening for surrounding network data or handshakes. This makes it a great tool for man in the middle attacks. There are also modules and packages you can install to increase your functionality even further.
Preparation
I don’t want to spend too much time on actually setting up the Pineapple. Instead, I strongly recommend reading the owner’s manual from Hak5 themselves. They have some sections you may be tempted to skip if you are seasoned, but reading through everything on that page may help improve your chances of success.
I set up a lab consisting of 3 laptops, a router serving two wifi networks, and the Pineapple. Laptop #1 was my primary machine, while #2 and #3 were a couple old ones I had laying around. Laptop #2 was physically connected to the Pineapple via USB and sharing its internet connection using Windows ICS. Laptop #3 is playing the role of our victim here. The victim is on one of the wifi networks by itself, which will act as our target network. For convenience, I just remoted into these two machines from laptop #1 to do all the work.
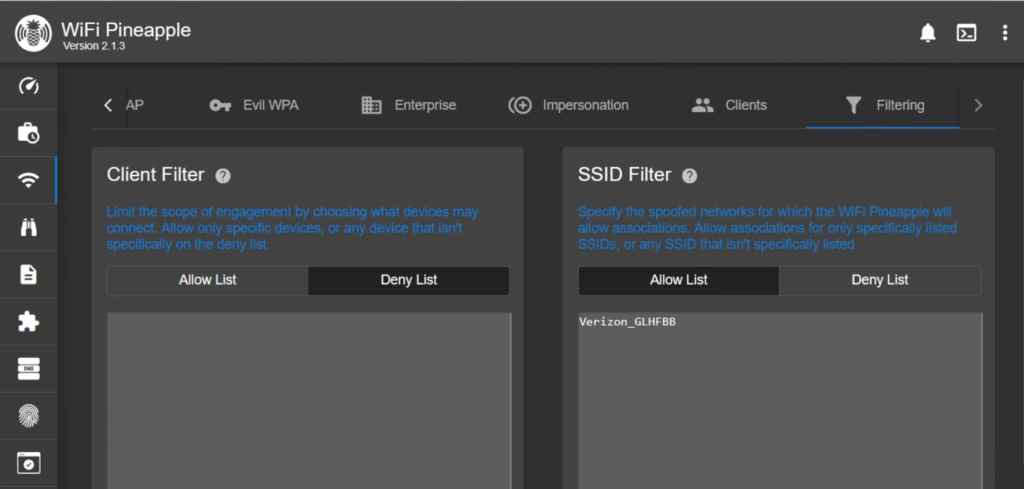
It’s important to make sure you are not working with any device or network that is out of scope, so we are going to get our access control lists (ACLs) set up first. From the web portal, click on PineAP Suite from the menu bar then select the filter tab. Here, we are going to set Client Filter to Deny List and the SSID Filter to Allow List. What this means is that our Pineapple will allow any client to connect but only to the SSID’s that we specify. For now, we can leave them empty and move on.
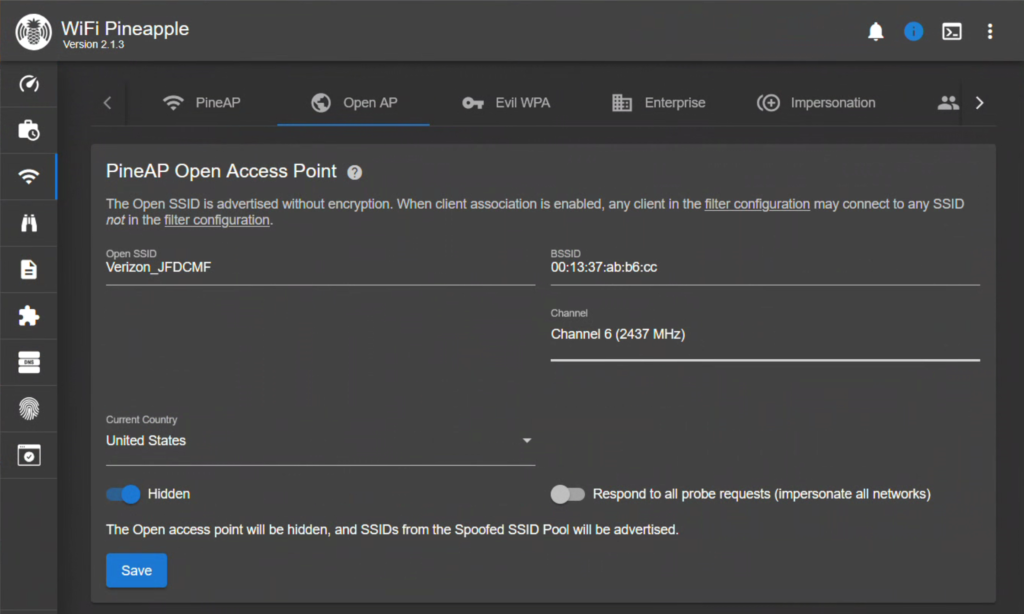
Now we want to make sure that the OpenAP is configured correctly. Setting this up will improve our chances of capturing a handshake later. I named mine similar to the nomenclature Verizon uses as the default and set it to be hidden. Most importantly, I turned off the option to respond to all probe requests to ensure that I am not hitting anything unintentionally.
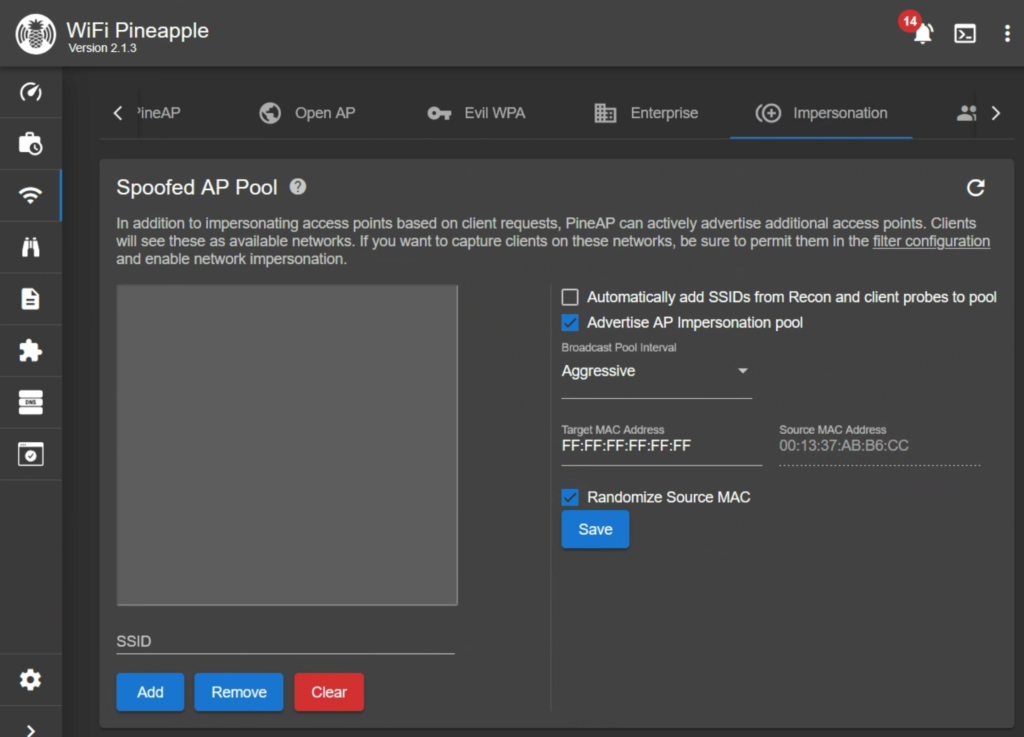
Moving over to the Impersonation tab, we are going to select all of them except for ‘Automatically add SSIDs from Recon… ‘. to further limit the scope of the engagement. If we enabled this, it would start impersonating every wifi network it sees. I set my Broadcast Pool Interval to Aggressive.
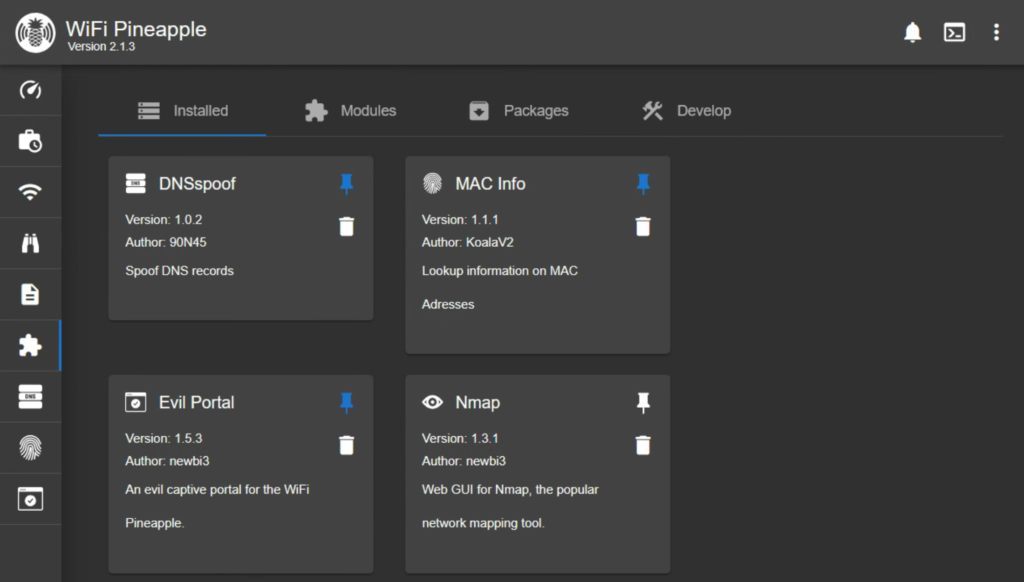
We will also need a couple apps for this to work, which we can get from the Modules page. You should play around with the various modules and packages available to the Pineapple, but in my experience having too many loaded at once can bog the device down. I started with more and kept the ones I was using the most. For this demonstration, you only need the DNSspoof and Evil Portal modules.
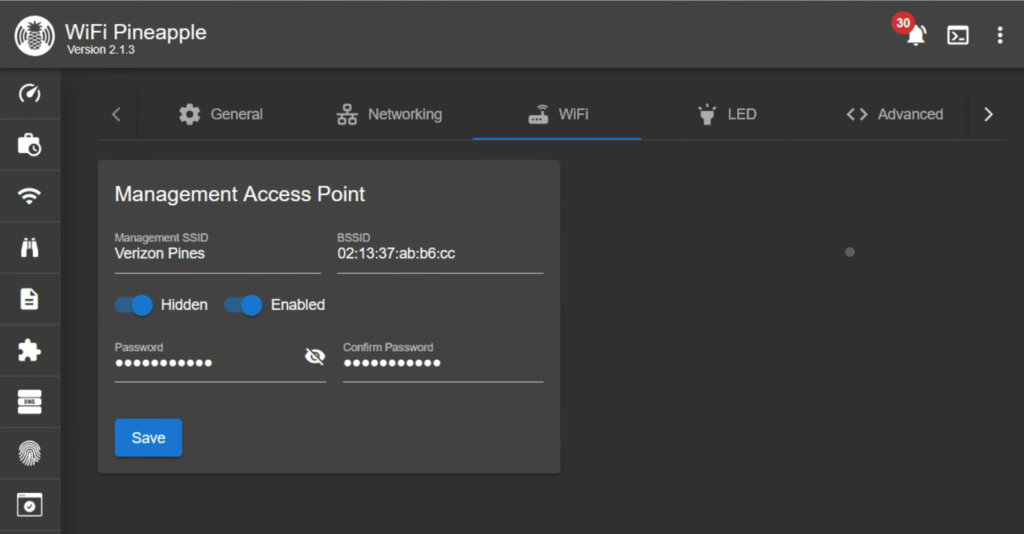
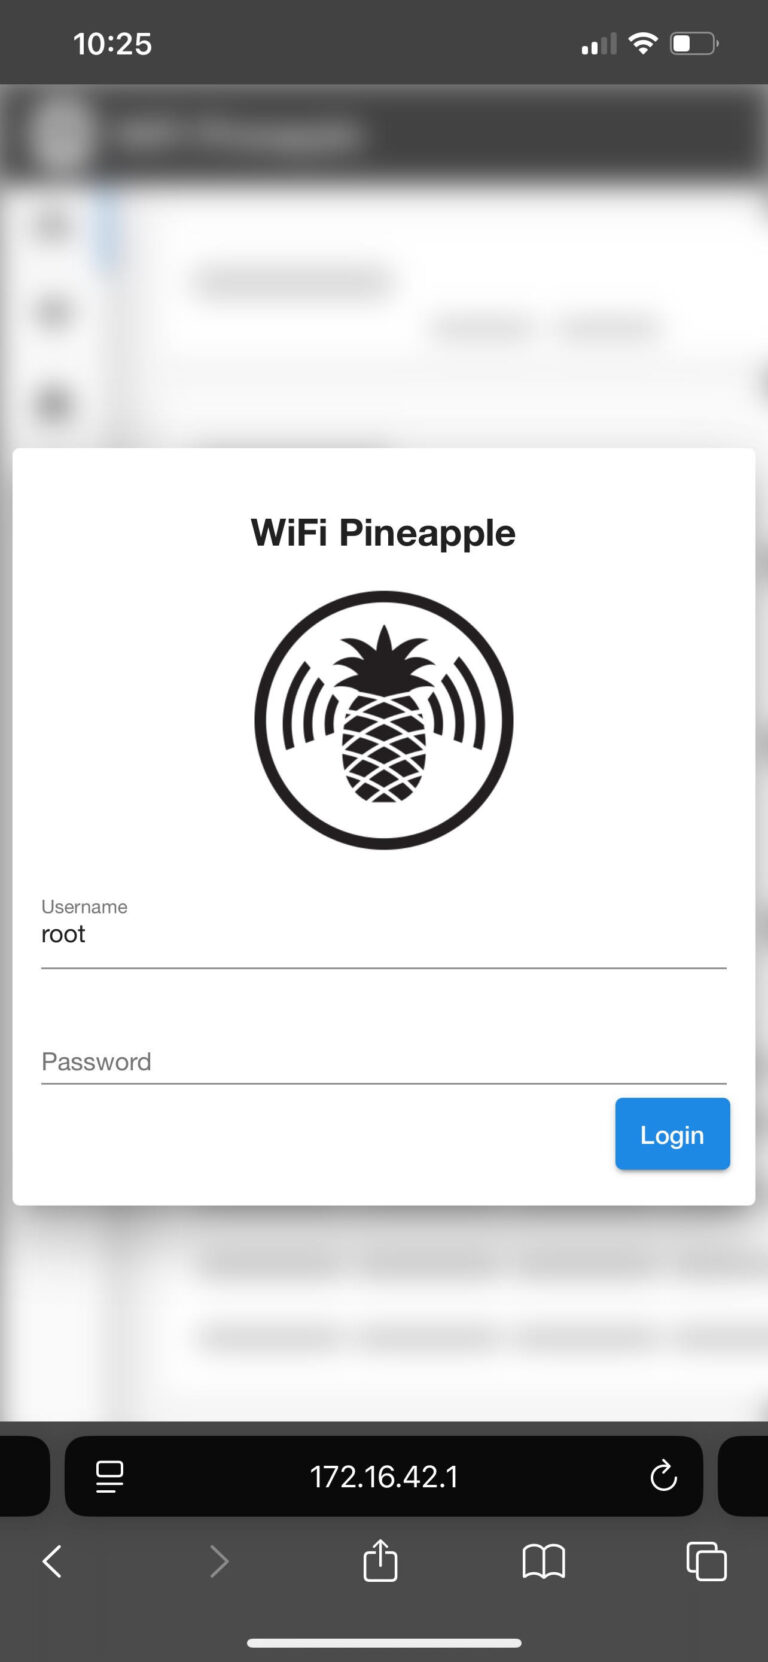
This next step is completely unnecessary but pretty cool. You will want to head to the settings page and then the WiFi tab so we can configure the management AP. I set mine to be hidden and used it to connect to the pineapple from my phone. Neat!
Attack Scenario
Now we get to the fun stuff. I will walk through a hypothetical scenario where we perform a deauthentication attack, crack a wifi password, host an evil twin of the target network, and capture credentials using a malicious captive portal.
We then take it a step further by hosting our own malicious website from the Pineapple and using DNS poisoning to redirect our victim’s traffic to our fake login page. There is a lot here, but I feel like it encompasses the experience well and highlights the skillset needed to perform it.
Recon Phase
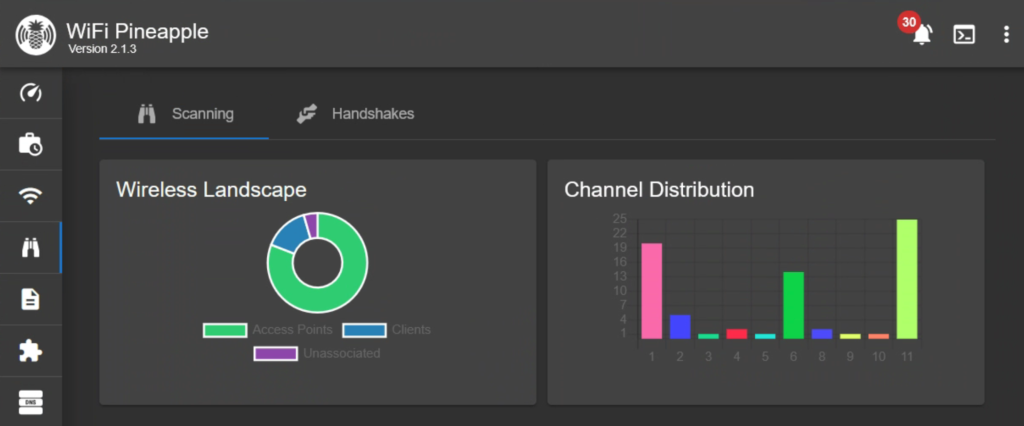
The first step is to do some recon. Head over to the appropriate page in the pineapple’s GUI and scroll to where you can begin a scan. We want to disable Capture all handshakes, select Continuous mode, and let it run for a bit to get a lay of the land.

You may notice that it doesn’t pick everything up right away. Not only does there have to be active traffic in the air, the Pineapple also has to be listening on the correct channel when it happens. During recon, the Pineapple hops through each wifi channel and briefly listen for traffic. This can take a little time, and if you are scanning 5GHz it will take even longer as it adds another 24 channels to snoop on.
You will see the graphs on this page fill out as clients are seen talking on different channels. We can also take this opportunity to switch our OpenAP to use a less congested channel if we want.
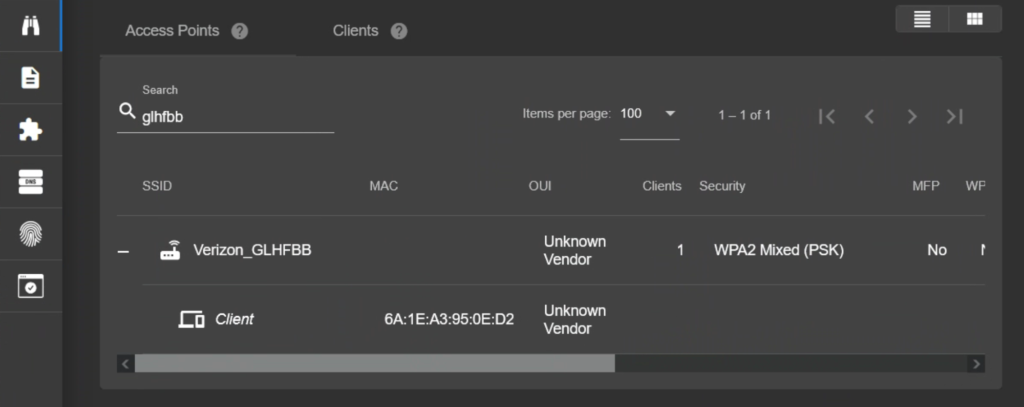
If you are having trouble discovering your victim with the Pineapple, try generating more internet traffic from the device. I ended up opening an online game and a browser radio. Once we see our target network we technically have everything we need, but we are going to wait for the victim device to appear. In my case, my target network is Verizon_GLHFBB.
Deauthentication Attack
Now that we have a target identified we are going to want to capture the handshake that occurs when it connects to the network. We could wait for this to happen, but it may take a while. Instead, we are going to perform a deauthentication attack to move this process along.
Spacehunn has a great article covering this process in more detail. Put simply, with just a source or destination MAC address you can force devices to disconnect from their wifi. This attack involves sending deauthentication frames to either (or both) the wireless access point or the target itself.
Devices will typically reconnect automatically and the target is unlikely to notice the disruption. But while this happens we will be listening, and with any luck we will capture enough of the digital handshake to try to crack the network password. So let’s see what that actually looks like.
Since we are limiting the scope of our engagement with an SSID whitelist, we will need to add our target network. To do this, just click on the network then select the option to Add SSID to Filter and Add SSID to PineAP Pool.
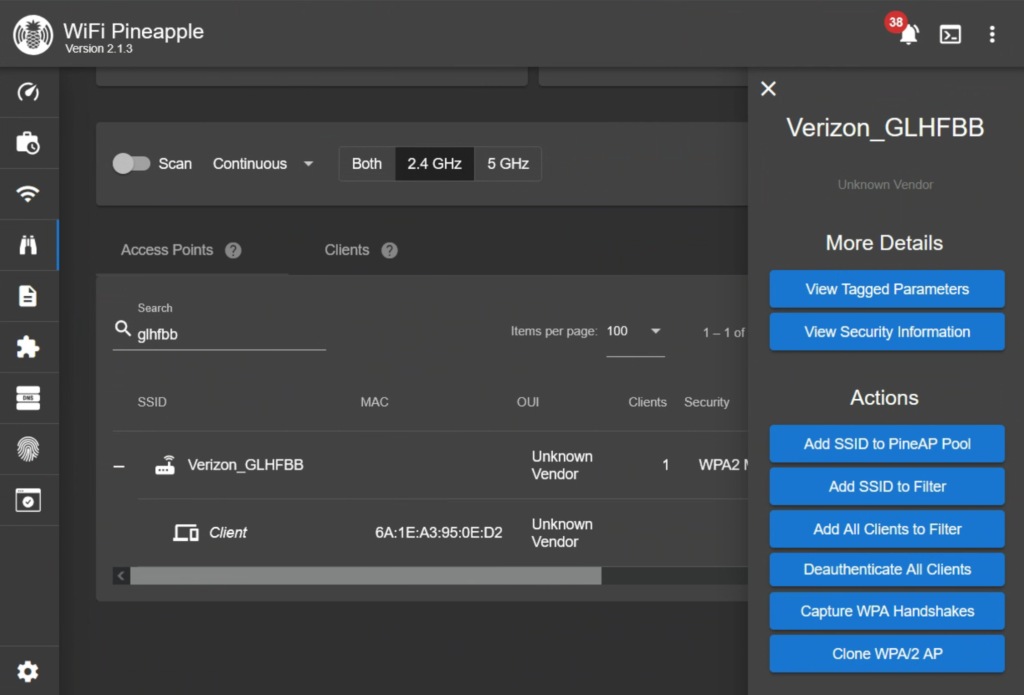
I mentioned earlier that you don’t technically need to see the target device associated with the network for this attack to work. In the image above we can see the option to Deauthenticate All Clients which works by telling the access point to drop all of its connections.
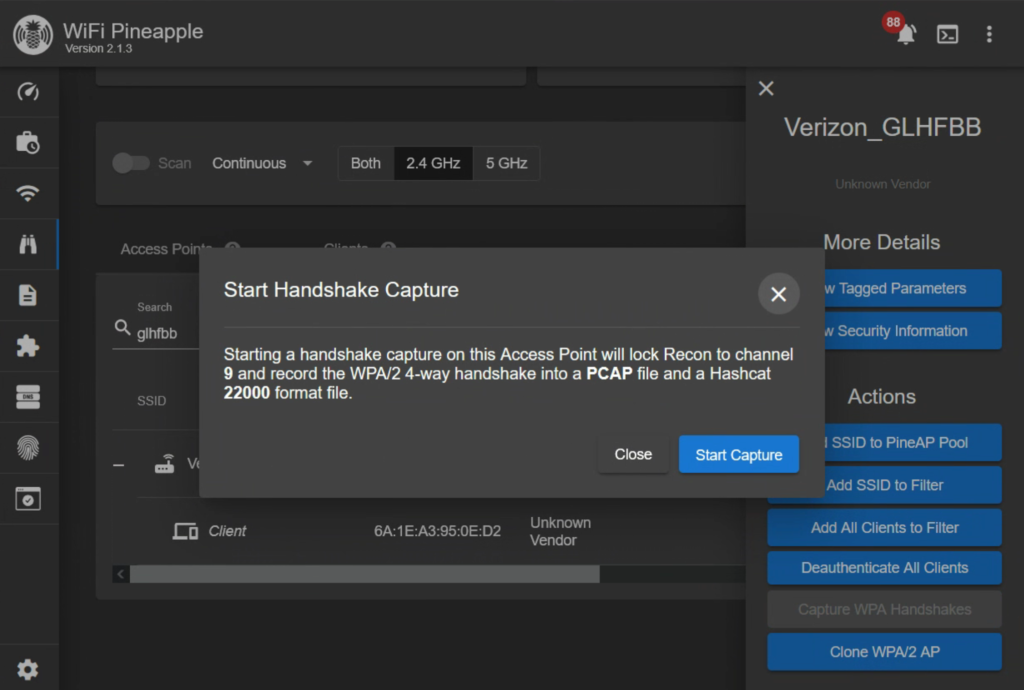
This works, but it may include devices outside the scope of this engagement. Instead we are going to deauth our target, but first we want to start listening by clicking on the Capture WPA Handshakes.
Now that it’s listening, we will click on our target device then click Deauthenticate Client.
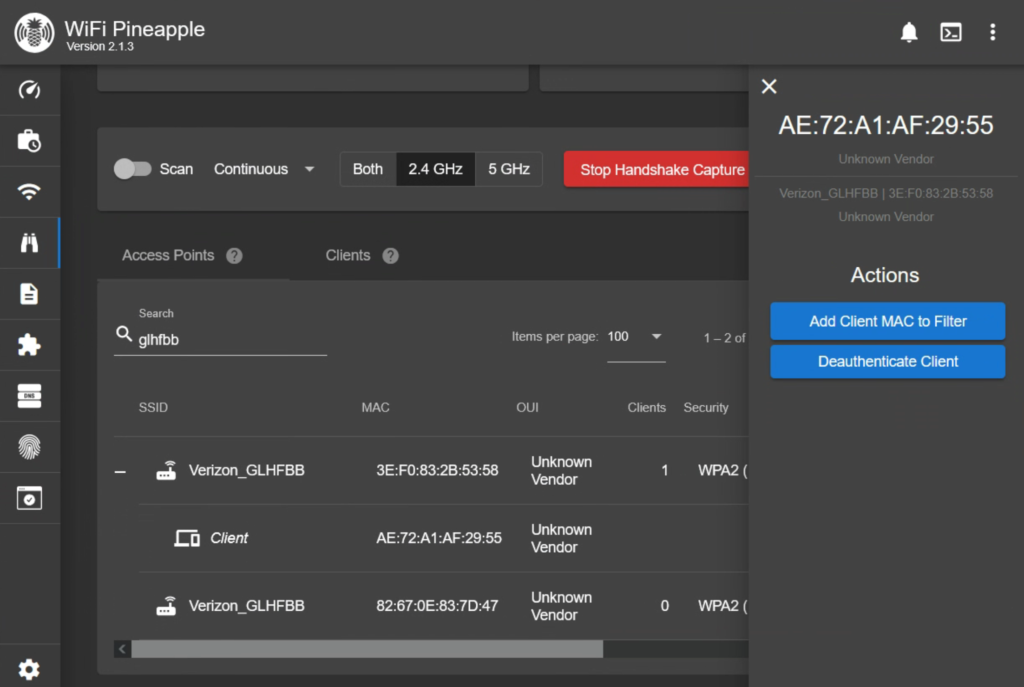
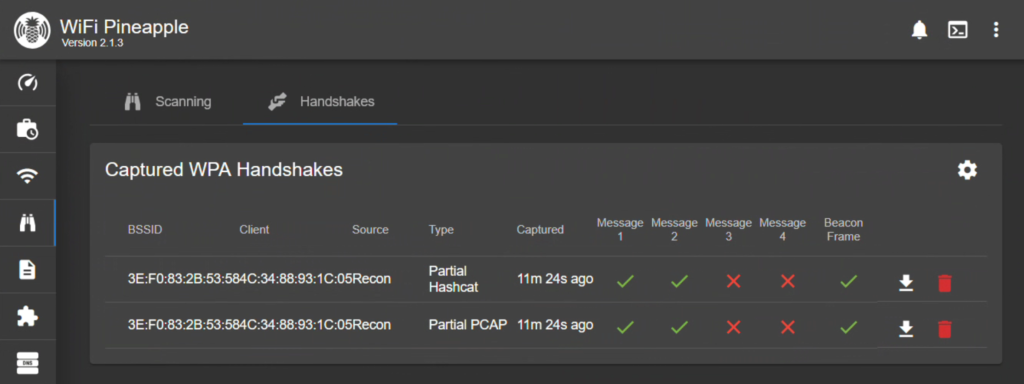
Just like that, we have captured our handshake between the victim and their network. This process could take a few tries. I would recommend waiting a couple minutes in between deauthentication attempts. Once captured, we don’t need to listen anymore so we can Stop Capturing Handshakes.

Password Crack
To take a peak at our loot, head over to the Handshakes tab on our current page. We can see that we captured a partial pcap of the handshake and also it converted the handshake to a format that hashcat will accept. The handshake contains the password, just not in plain text. That would be too easy.
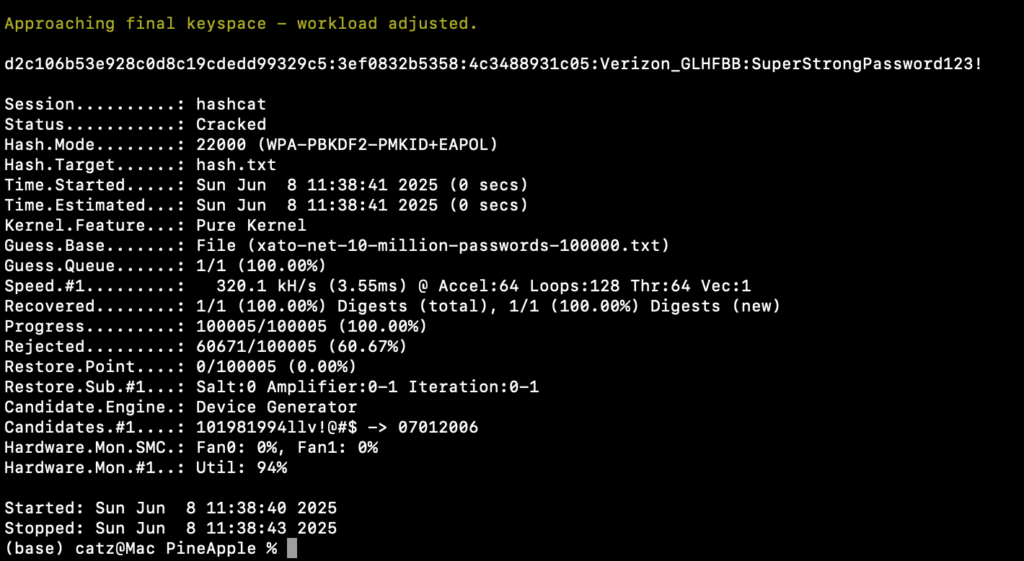
You don’t even need to capture a full handshake to be able to crack the password, as we have shown above. We can see my victim network is using the password SuperStrongPassword123!. At this point, we could connect to Verizon_GLHFBB and explore further, if we were so inclined.
Evil Twin
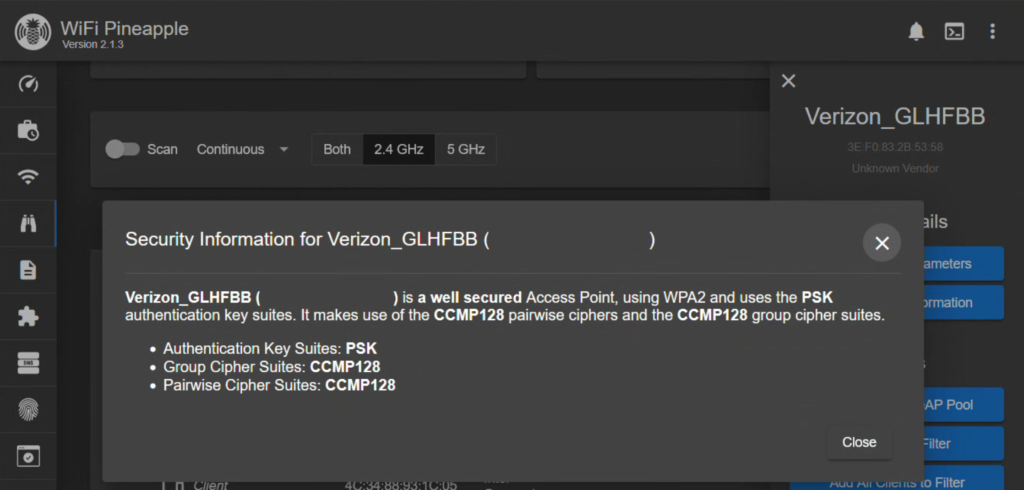
Instead of connecting to Verizon_GLHFBB, we will be performing an Evil Twin attack. This is where an attacker impersonates a legitimate network with the intention of getting a victim to connect to it instead of the real network. This is a type of man-in-the-middle attack that puts us in a position where we can perform our next two attacks.
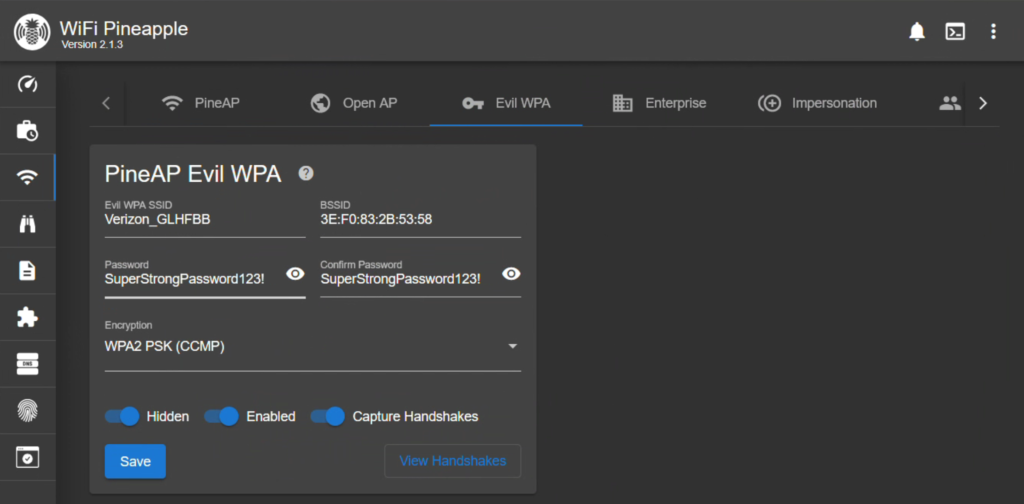
To get started, we are going to head back over to our Recon page and find our network again. Once selected, choose the option to View Security Information and take note of the details. Close that popup and click Clone WPA/2 AP. Here, we can now set up our cracked password and security settings to match the real network. Once that is made, head over the Evil WPA tab of the PineAP Suite page to confirm it is enabled.
So how do we get a device to connect to our AP instead of the real one? Well, we could deauth the device again and hope it connects to us instead. This is tricky though, because you have to orient it in a way that your Evil Twin is providing a stronger signal than the real network, or it won’t stay connected. This is fiddly and in my experience it’s better to just have the victim away from the real network entirely.
For this article, I just turned off the real Verizon_GLHFBB so that my evil twin is the only AP offering that SSID. In the real world, this may be a situation where you crack the password for the target network, create your evil twin, and then present the network to the victim while they are away from its original location (or any other familiar networks).
For example, an attacker could capture and crack the target network’s password from their car in the business’s parking lot. Then around lunch time, they could just follow a car to a restaurant’s parking lot and turn on the evil twin. It is likely that their evil twin will be the only “familiar” network nearby and the device will usually connect automatically.
Almost immediately upon turning off the real network, my victim device connected. You may notice the device connect and disconnect a lot but this was normal in my testing. You may also want to remove this SSID from your impersonation pool so you aren’t advertising it twice. With that, this phase is complete.
Evil Portal
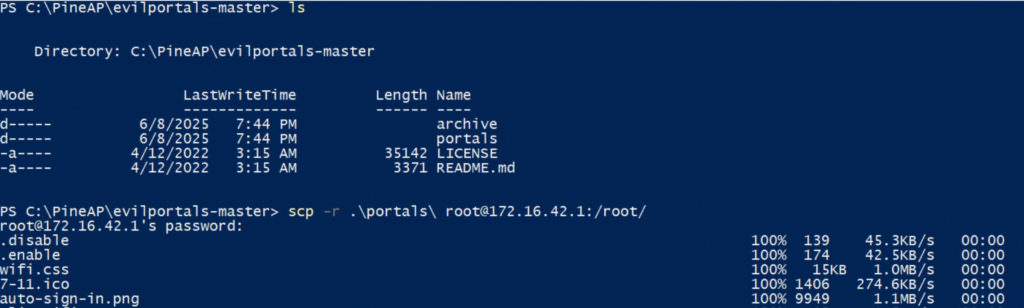
This attack will be easier than the next, since we just need to install a few things. We should already have the Evil Portal module installed but we will also want this collection of pre-made portals from kleo. Unzip the files and then you can upload them to the Pineapple using secure copy.
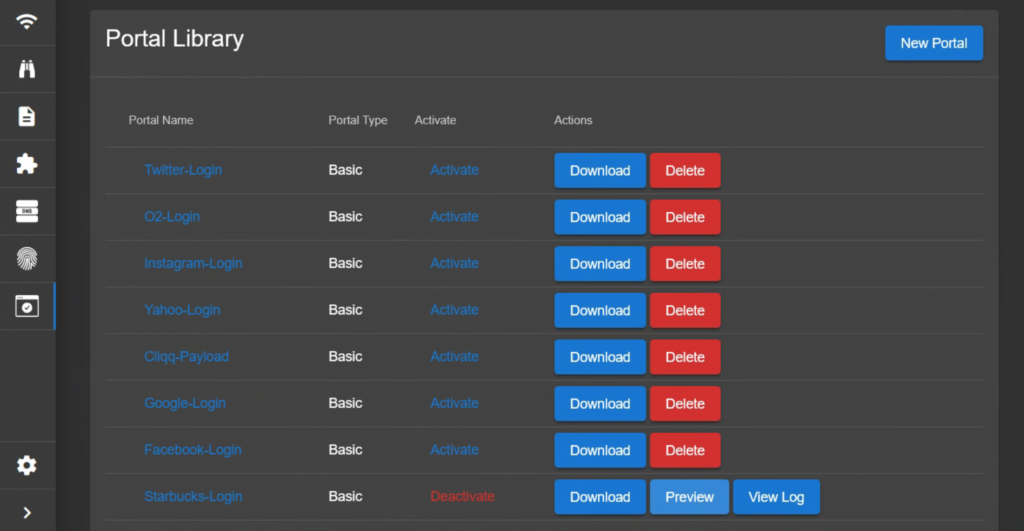
Head over to the modules tab in the Pineapple’s web console and pin both Evil Portal and DNSspoof. Now if we click on the Evil Portal page we can see all the portals we just uploaded under the Portal Library section. Activate a portal and make sure that both the evil portal and web server are running.
So what is a captive portal? We encounter legitimate ones often when connecting to wifi at a hotel, airport, or library. When you click to join the network it will usually pull your up your web browser before asking you to log in or agree to a terms of service.
This ubiquitous feature of public wifi could be abused though. Say, if an attacker decides to use a Starbucks themed portal while advertising an open network called Starbucks Guest and enjoying a shaken espresso at their local big box cafe.
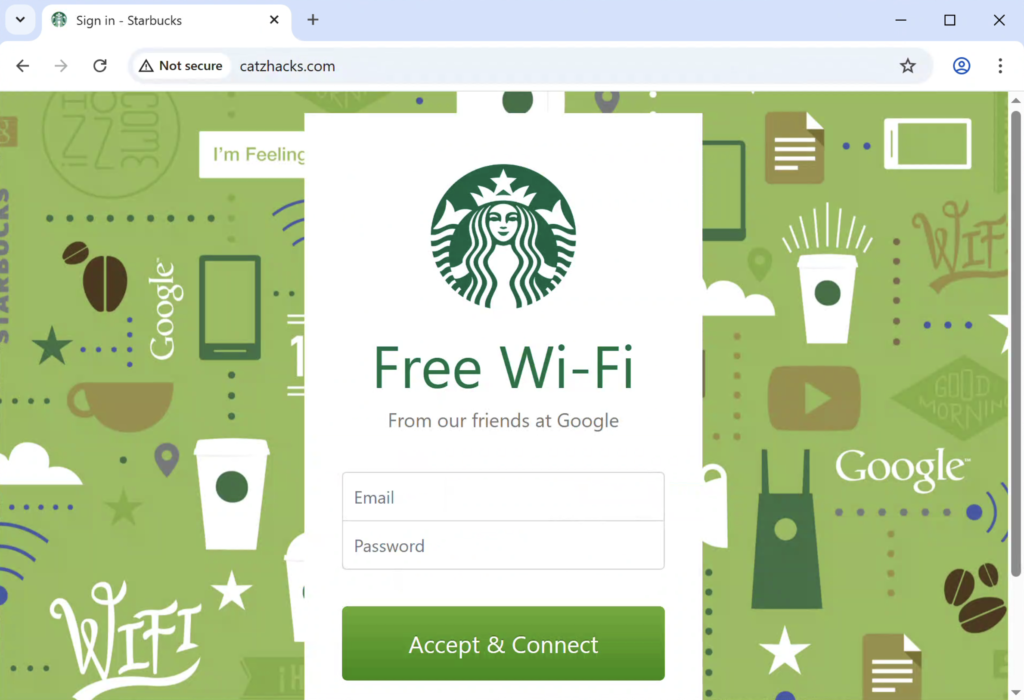
For the victim, this process is pretty insignificant. After entering my credentials, I got an error stating I wasn’t authorized. Instinctively, I try loading the site again and it works without me giving it a second thought.


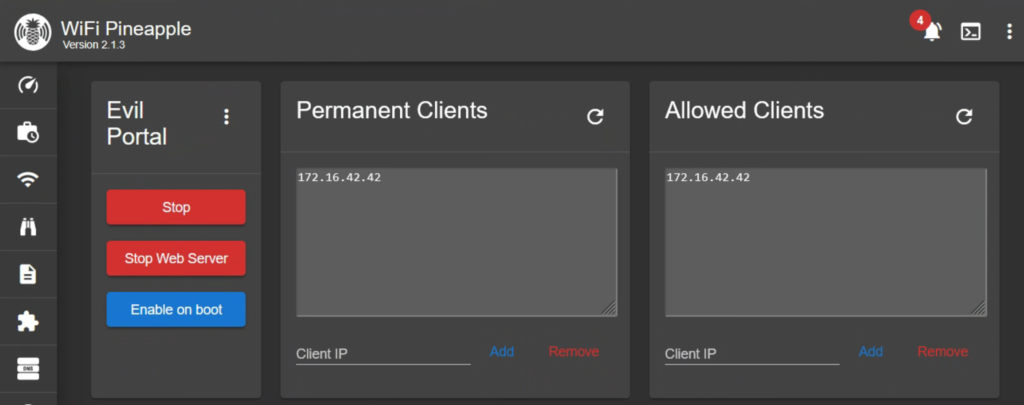
If we jump back to our attacking machine and the Pineapple GUI, we can see a new IP has been added to the Allow List for Evil Portal. This means we wont see the portal again unless we remove it or their IP changes. We can also scroll down to the portal and click the View Log button to see our loot.
This is pretty cool, and with a little polish could be even more impressive. It would be better if it routed to the site after capturing the credentials, but I’ve spent too much time on this project to start fiddling with that too.
Evil Site
This final attack is more interesting, even though my initial expectations were a bit misguided. The idea is that I would host a malicious portal I designed from the Pineapple, redirect a victim’s traffic to our site using DNS Poisoning, and record their credentials before passing them on to the real site.
Sounds straightforward, but this portion was plagued with issues and incorrect assumptions that dragged this process out. To start, I got in way over my head trying to make a login page myself. I thought it would be an easier undertaking to just clone a portal, edit the scripts a bit, and reuse it as my login portal. But I am no web developer and quickly found myself out of my depths.
I also hadn’t originally planned on messing with SSL stripping. I figured I would just make an HTTP phishing site and use DNSspoof to handle the DNS Poisoning. This was when I learned about HTTP Strict Transport Security or HSTS. This makes it so if a site has HTTPS, your browser will convert your request to HTTPS for you automatically. This defeats our DNS Poisoning because it will only route to my phishing site with HTTP.
So then I thought, maybe I will do SSL stripping after all. But then I found out that HSTS breaks SSL Stripping too… This is because websites can tell your browser that they enforce HTTPS use and your browser saves this information to your computers storage. Your browser then remembers this for when you try to visit the site in the future.
So what do we have left then? Well, DNSspoof will still work if the victim manually types out the entire phishing URL (like http://spoofedSite.com), but that is unlikely. Instead, let’s send our victim a phishing email to see if we can get them to click our link and sign in.
My plan was to use a malicious Microsoft login page. To get my phishing email ready, I first submitted a password reset request to the actual microsoft.com. This gave me a quick template for my phishing email that would look somewhat legitimate.
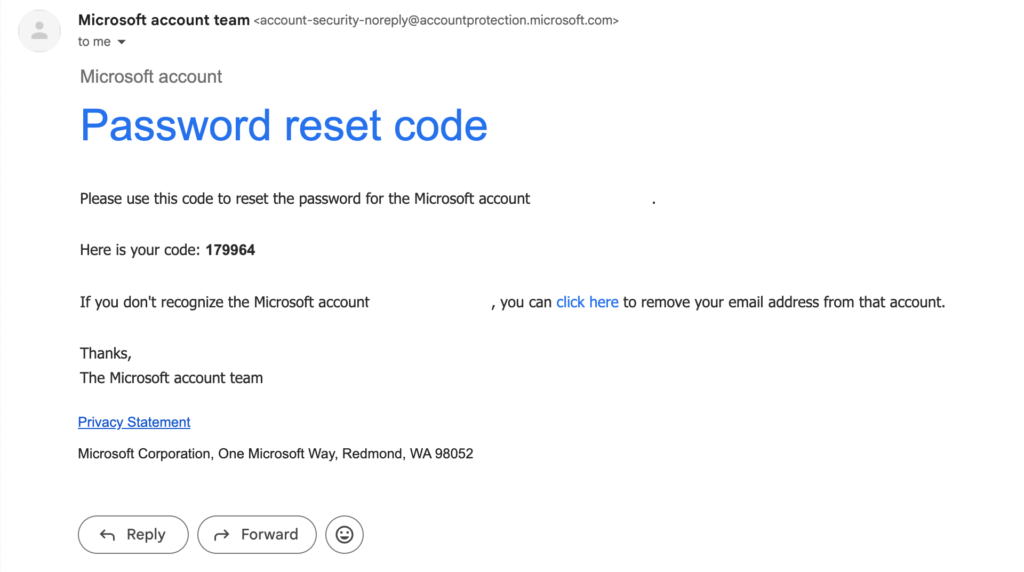
Above is the email I got from Microsoft. I made a few modifications to the email to make it fit to our pretext. Then for the link, I made the hypertext use https://login.microsoft.com but the underlying URL is actually http://microsoft.com. This should defeat HSTS for us since we are explicitly stating to use HTTP.
Before we find out if I fall for my own phish, we need to get our malicious site up and running. I tried and failed to reinvent the wheel but landed on a page that is far better than what I could have done, made by JoniRinta-Kahila.
First let’s transfer the contents of HTML&JS-only to the /www/ folder on the Pineapple. Then we will need to replace the javascript file with my custom one.
We will also need to make a php file to handle the logging. Name it log.php and it will get drop it in the /www folder too.
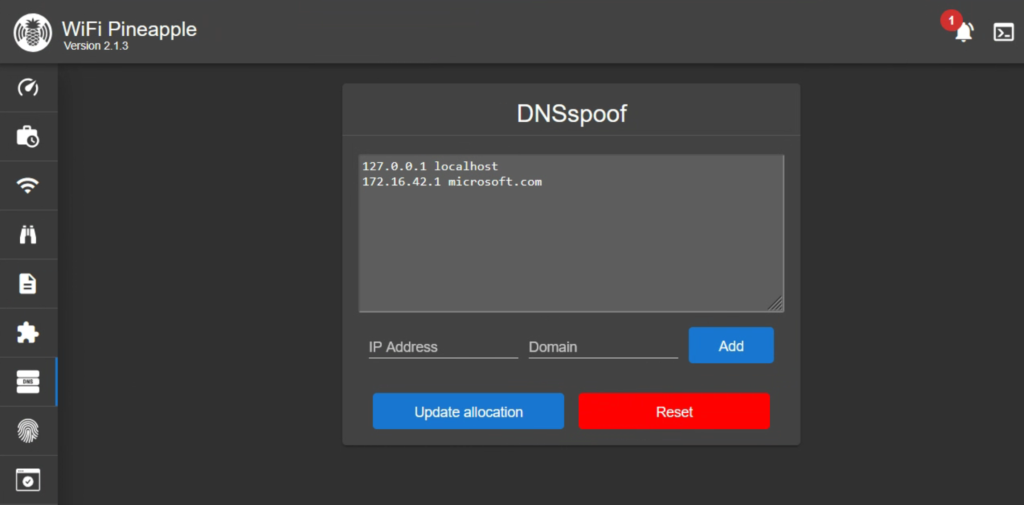
Now, jump over to the DNSspoof module in the Pineapple to add the Pineapple’s IP and the domain you are spoofing.
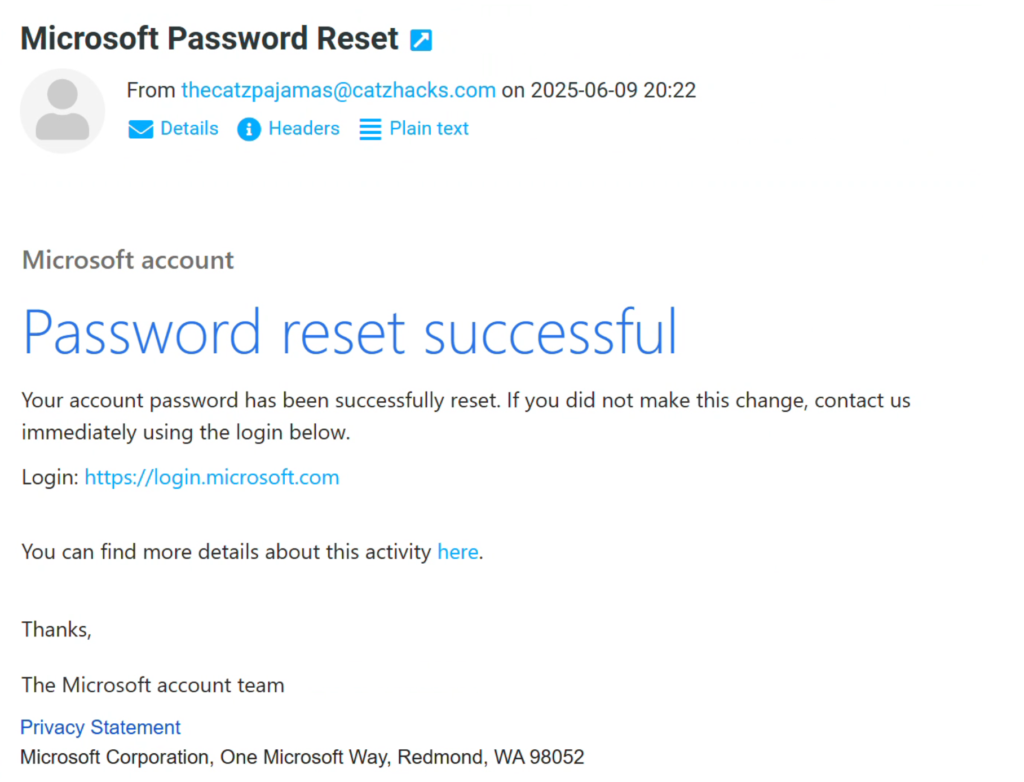
With everything in place, I will return back to my role as victim. I am using Chrome v137.0.7151.69 at the time of writing. Sitting at Starbucks while enjoying my coffee and free wifi, I suddenly get an email from microsoft stating my password was reset. I definitely didn’t do that, so I quickly click the link in the email and am greeted with a login page as expected.
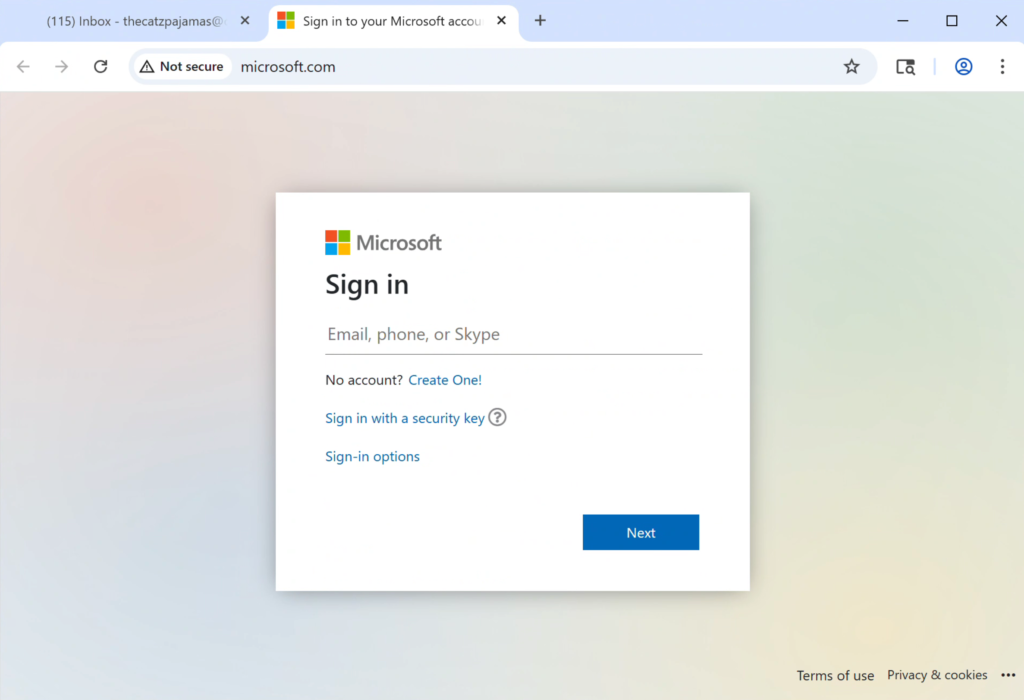
Notice that in the address bar it says microsoft.com, but it also says we are not secure. This is our phishing page and DNS Poisoning in action. Without DNS Poisoning, the browser wouldn’t show us that we were on Microsoft.com. When I attempt to log in, it just loads the Microsoft page again.
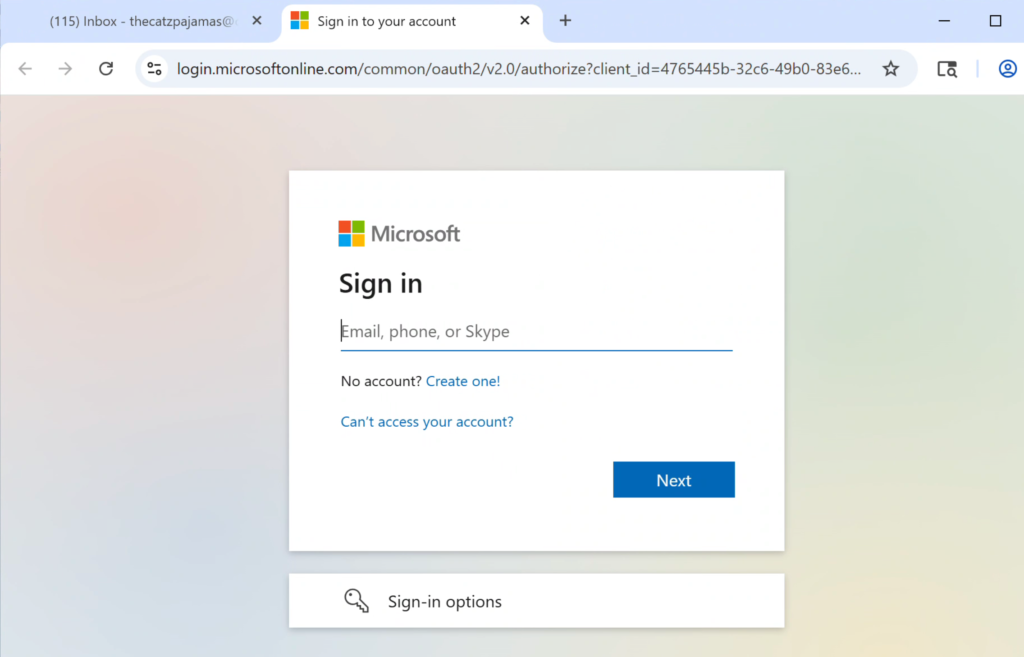
If you look at the address bar again, we can see that this time it is actually the real Microsoft login page! As the victim, I am slightly annoyed about having to type my info in again, but I do it anyway just to find nothing is out of place with my account. For the victim, the attack is already over.
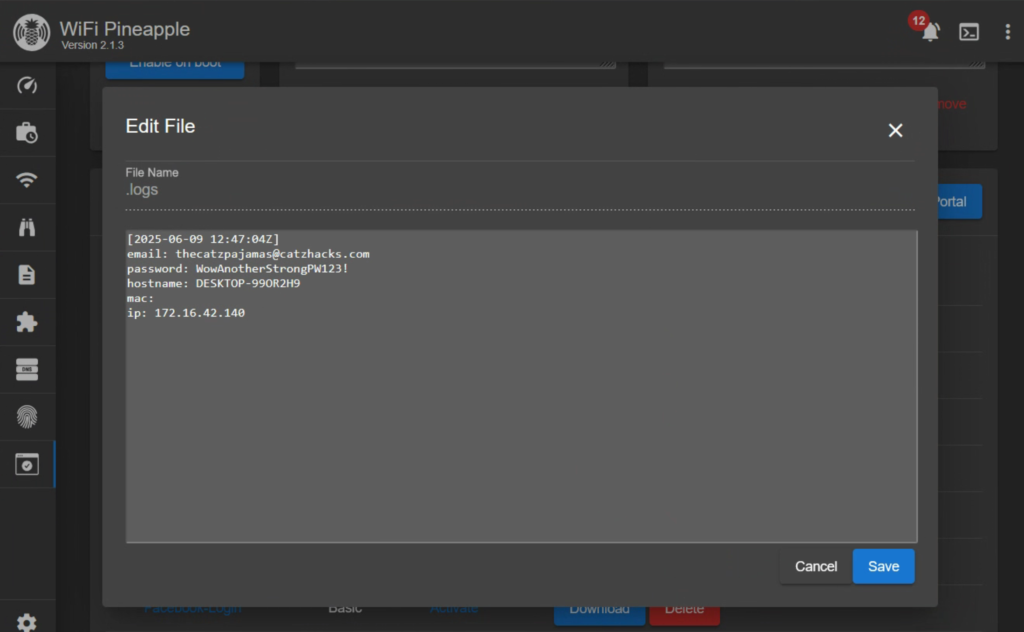
In the Pineapple, if we head over to /root/sitelogs/session_log.txt we can see our password has been recorded.
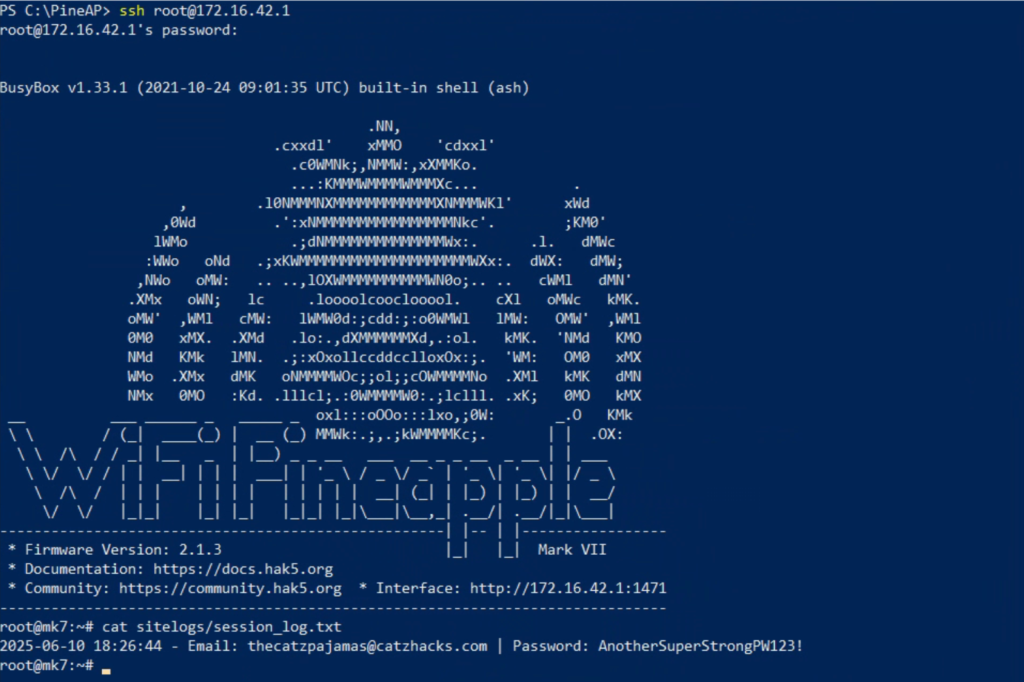
Pretty slick, right?
Prevention
So how do we stop this from happening? It’s a multifaceted attack, so there isn’t a single silver-bullet that will protect you. But let’s walk through what we’ve accomplished today and see how we could thwart it along the way.
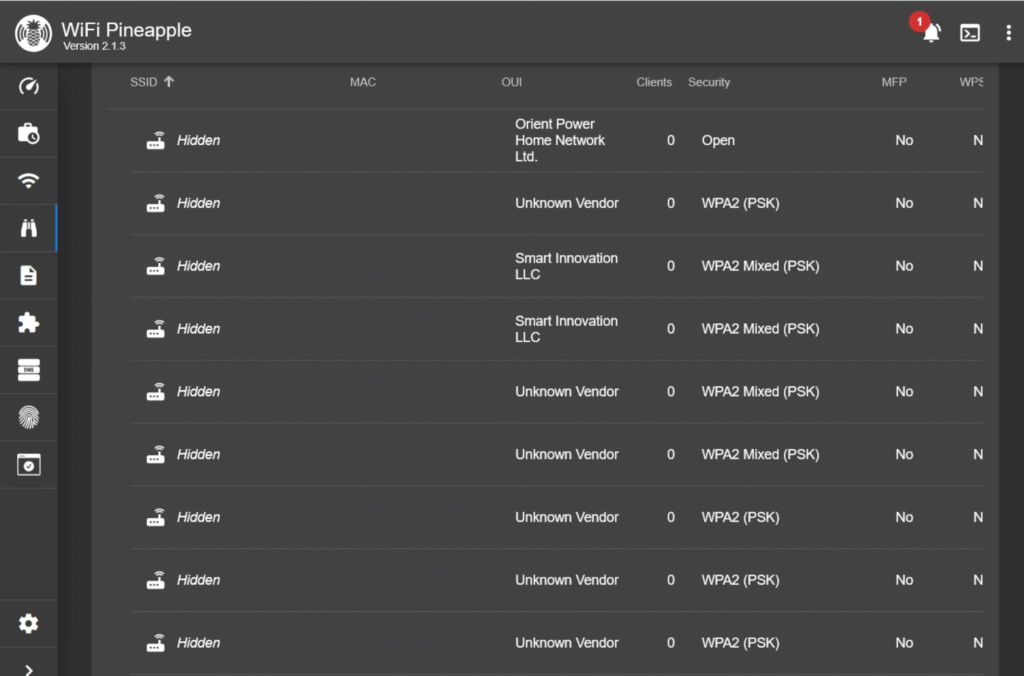
The first thing we did was use the Recon module to identify a target. There isn’t a good way to protect from this because these communications are flung all through the air and they require at least some amount of identifiable information to ensure the traffic reaches its destination. Changing your network to Hidden won’t help either. Just look at a small sample of the hidden networks I discovered with Recon.
The next thing we did was performed a deauthentication attack to capture a network handshake. This resulted in us cracking the network password, but also gives us the ability to fully imitate the target network when attacking our victim. There are two things to be done here.
The easier of the two, is to us a strong passphrase. The next thing to do is a pain in the toe, but you want to stop using the feature to automatically connect to networks. While convenient, it’s this exact setting that makes the Pineapple viable. Without it, it would take much longer to capture a usable handshake as you would have to wait for it to occur naturally instead of instigating the process with a deauth attack.
So what about the evil portal and the phishing site? The best thing you can do is avoid using public wifi. If there is no security or the password is easily available, there is nothing from stopping someone from setting up an Evil Twin like we did and capturing your traffic.
Security works best in layers. Just like a knight’s armor can have many plates, or just a few crucial ones, so is everyone’s approach to staying secure. Businesses and individuals have to weigh their own risk, cost, and tolerance for cyber security. Think “what would my losses be if I were hacked?”, “How inconvenient is it to be secure?”, and ultimately “What level of risk am I willing to accept for the cost”.
For a business, this is almost always tied to dollar amounts. For a person though, your cost is often seen in the effort it takes to type in a long password or to look it up in your password manager. The best thing a person can do is try to tolerate the inconveniences of the security measures that have the most impact, then branch out to other measures you may be willing to stomach.
I would recommend strong passwords, multi-factor authentication, and using unique passwords per login as a good place to start.
Conclusion
Alright, you survived until the end! This was by far my longest and most challenging article to write. It involved a lot of reading, troubleshooting, and playing around. This was fun because it felt a little more real and a little more Hollywood at the same time. That hacker in a hoodie at the coffee shop getting ready to download a car or something else illegal.

But in all seriousness, there is a lot to learn on the road to being a hacker and finding ways to make the process engaging is essential. I hope you have had fun and maybe learned some ethical hacking along the way.
Thanks for sticking in there with me, and be safe out there.